A couple pix from today: Interior, bow pic, y El Capitán
(Note the interior view of her new windows.)
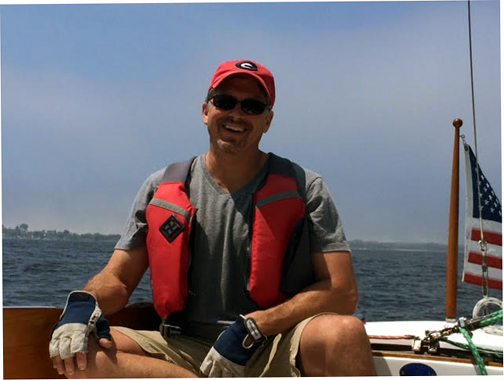

A couple pix from today: Interior, bow pic, y El Capitán
(Note the interior view of her new windows.)

Last edited by Lucky Dawg; 06-08-2015 at 06:41 PM.
Kyle
C-65 Lucky Dawg

Sweeeeeeeeeet! Those portlights are gorgeous and the crew looks like it approves too.
Mike
Totoro (Sea Sprite 23 #626)

Kyle
It's great to see the kids having fun on the Dawg! Saturday I had my granddaughter Kiera out and at one point she said "this is my best day ever!" And Sunday I had my two grandsons Nathan and Jacob out sailing and they were arguing who was going to get to steer when and for how long. I think it is important for us to expose kids to sailing. They are our future and some day it will be their turn to keep these good old boats sailing. It is really nice to see you doing your part to keep it going! Sail on!!!!
JERRY CARPENTER - C147
A man can succeed at almost anything for which he has unlimited enthusiam.

Looking good Kyle! She's prettier every year.

Well, I didn't expect this! Client cancelled today and I went up to Lucky Dawg's slip to just noodle around. Had noticed some water pooling under the stbd bunk inspection port for a year or so. Figured it was just finding its way in - water is tricky like that. When I got there today, there was a good bit more water. Side stays were dusty dry, couldn't find any other intrusion points. Checked the sink seacock and YIKES! Water bubbling in at a pretty good clip. Yaddayaddayadda, Torresen's pulled her with the Travelift.
With some direction from the Torresen's guys, I pulled the thru hull, pulled the seacock, sanded down the mahogany spacer, disassembled, cleaned, and greased all of the seacock parts, and put it all back together. Hopefully, I can loosely reinstall on Saturday with some 4200, tighten down on Sunday.... and hopefully relaunch on Monday.
Had I not had a cancellation today, who knows how deep she would have sunk before Monday when I planned to return!!! Holy Moley!
Kyle
C-65 Lucky Dawg

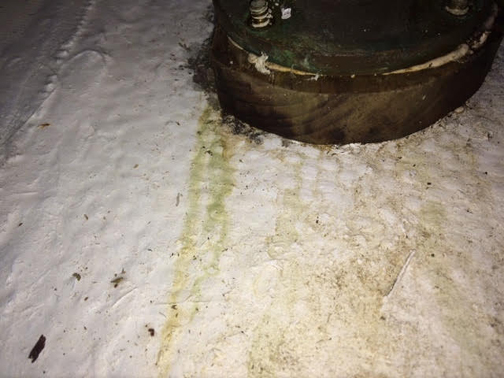
photos... You can see where the lower, forward through bolt was leaking - greenish drip line.
Kyle
C-65 Lucky Dawg

and...
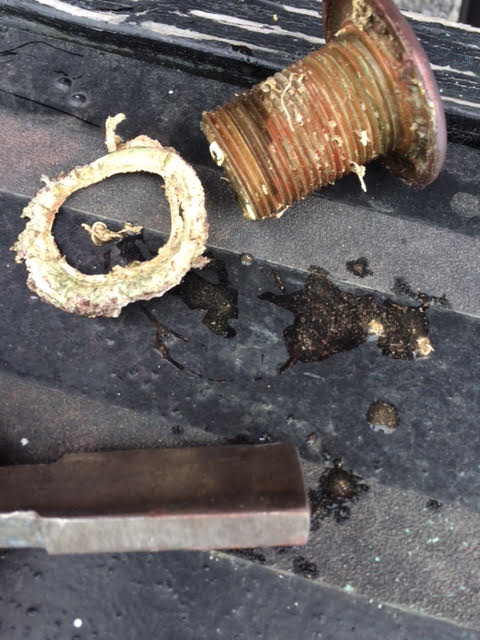
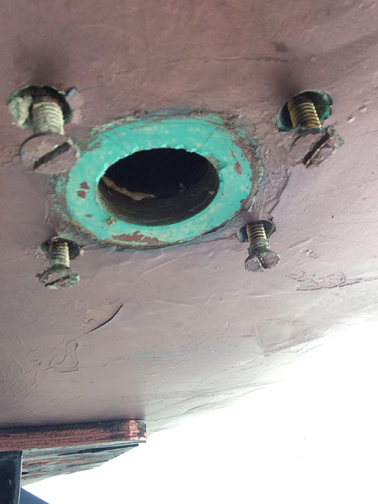
Scary to see sunlight through your hull!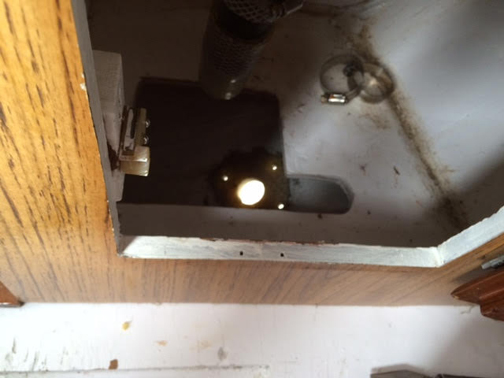
Kyle
C-65 Lucky Dawg

The only through hulls Destiny has left are the scupper drains and the sink. I'm not a fan of holes in a hull and these kinds of issues are why. Really glad you caught a break and a leak before it was too late!
JERRY CARPENTER - C147
A man can succeed at almost anything for which he has unlimited enthusiam.

Be sure and thank that client of yours! Whew!
Mike
Totoro (Sea Sprite 23 #626)


Feel like this nutcase in the end of the bar we need to avoid because he's got
an opinion on everything....
If we must have a few thruhulls, why not install them as a maintenance item,
make them easy to 'service'.
Make sure the hole itself is in good shape, it can be restructured with epoxy.
Consider a large backing block permanent. If you do, you can epoxy it into
place and drill the thruhull hole cleanly thru it as well as the hull. The backing
block can be wood or plywood, but better if fiberglass sheet or G-10.
Consider bolting the seacock on butyl tape. Get it off latter, any time.
Threads running into the seacock can be brushed with lanocote.
{Lanocote is a sheepwax product sold inexpensively by the jar, produced by
Forspar. They, being foreigners, call it corrosion inhibiting lubricant...
but it actually is a very sticky, non-runny, marine grease extracted from
sheep's wool. Smells important, too!}
Prefer first to have the seacock solidly fastened in place, with shut-off handle
and hose lead where destined to live forever. Seacock cinched up strong as
if structurally part of the hull. Butyl stays active as a sealant squeezed into
a thin film. But before assembly, you can lay into the tape a circle or two of
10# nylon leader, to assure glue-line after fasteners are tightened home.
Apply lanocote to bolt threads, and into the drilled holes with a small stiff
art brush, or mini bottle brush.
Run a bead of rubber sealant like 4200 on the inside of the thru-hull flange....
The curmudgeon, at the end of the bar, wiping foam off his mustache from
a fresh drought of ale, sez, he don't advise this... if the assembly is shipshape
no water will get in, and if it does it can't get by the seacock.
Should lanocote get up into the valve chamber: there is no better lube for the
valve ball. The fitting will be able to back out without becoming a federal case.
Lanocote also acts as a galvanic barrier between dis-similar metals.
Will not harden. Why glue the thruhull rim to the hull?
As the clincher here, from outside, screw the thruhull into the seacock. If it's
a new one, and you forgot to dry fit the assembly, you can still back it out
and cut it shorter until the flange seats flush with the hull.*
Thread the thruhull deep as possible in the seacock.
Back the flange at the hull with tube rubber sealant if you must. But really, a
home- made EPDM foam gasket, or O-ring, or just lanoline is mo'betta.
If the hole the thruhull goes into is waterproof -- it should be, using a method
like this -- then the thruhull fitting doesn't need to be bonded in place - because
the finely-fitted seacock you bedded and bolted to the hull is protecting it.
Thus, with the seacock closed, you can remove the thruhull fitting underwater
- scrape it into pieces on a rock-- or sail around the world without it -- not a
drop getting inside the boat. {we do sail with seacocks closed...right?}
Thruhulls that can be unscrewed, maybe hard to get it started. Recall it's
not bonded, it can be undone. And the !@#$%! PITA seavalve stays intact .
It's ready to be disassembled, without insulting the gods, a decade from now.
imco
.................................................. .................................................. .................
* If we have, under the seacock, a substantial backing plate permanently
bonded with the hull, we can then use a chamfered flange thru-hull fitting.
Arguably, this requires a more picky and less substantial chamfered hole in the
hull. (Mushroom requires a much easier straight through with the protective
flange capped over it.) But it eliminates the mushroom hickey. It looks right,
hole less pronounced. Haulout prep easier, and the hull has way more 'ing'.
Last edited by ebb; 06-21-2015 at 11:31 AM.

Thanks for the guidance ebb! I wham-bam-thank-you-ma'am-ed the seacock back in with the original mahogany spacer setup and a generous amount of 4200. I put some newspaper in / below it to keep an eye on seepage and to date, it is dry as a bone. I'll do a nicer job over the winter. I had looked at Chance's seacock creations and that looks similar to what you're suggesting.
Yes, the sink seacock is always closed. I open and close it occasionally just to keep it operational, but never really using the sink, it doesn't serve much of a purpose. I keep the cockpit drain seacocks open.
Last edited by Lucky Dawg; 06-21-2015 at 09:12 AM.
Kyle
C-65 Lucky Dawg

Nice to be wing on wing - not sinking-ing!
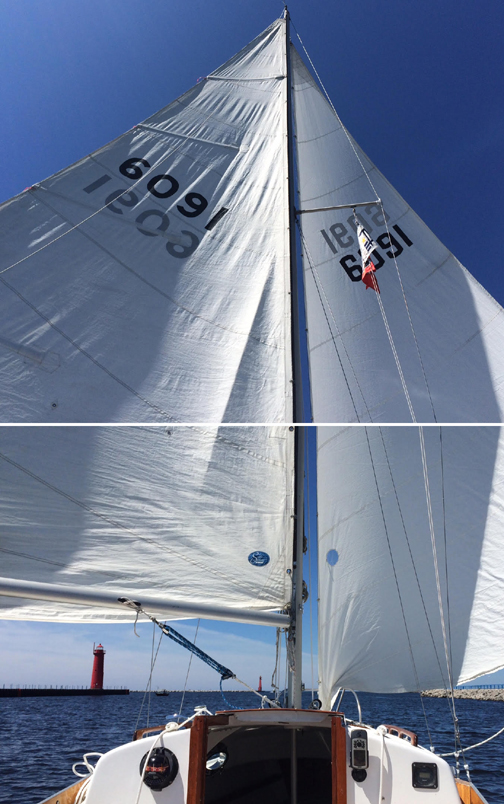
Kyle
C-65 Lucky Dawg

Good to see the ACYA burgee flying

Aww Yeah.... 18kts with friendly seas and good sailors
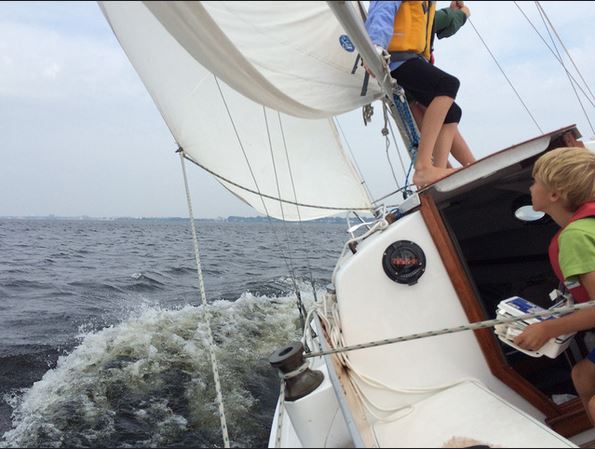
Kyle
C-65 Lucky Dawg
