+ Reply to Thread
Page 17 of 19 FirstFirst 1 2 3 4 5 6 7 8 9 10 11 12 13 14 15 16 17 18 19 LastLast
Results 241 to 255 of 278

Thread: Ariel #97

  1. #241
    Join Date
    Sep 2012
    Location
    Philly, PA
    Posts
    179
    ...another couple months and I am settled in Philly with a nice apartment (& attached shop). I also have a new job that has kept me really busy, to the point where I havent been able to get off the couch after work, let alone spend any time working on the boat, which is now over two hours away... I knew this would happen which is why i had been pushing so hard to get it back in the water last summer, but alas, its December.

    Questions!
    1. The interior has been progressing quite slowly so pictures would not reveal a whole lot. Most of my time spent has been filling, sanding and leveling with thickened epoxy. Which brings me to my first question- is there a good, single part, filler/leveler? I am tired of mixing expensive epoxy for fairing purposes. I have interior leveling as well as exterior. The cockpit is 80% finished, but a nice leveling compound might make things move a little faster, with less steps.
    2. Another item that I have been spending time with is grinding the gelcoat off the bottom. This is not a project that I had anticipated as taking so much effort.... Im stuck finishing what I had haphazardly started- partially because I was already having to fill and fair nearly a half dozen holes and all the spider cracking in the gel coat made me cringe. Anyway, I have ground the starboard side of the hull (below the waterline) all the way to virgin glass. However, I wanted to ask what would be the proper way to transition to the relatively new red topsides. So far, I have ground to about an inch of the red alwgrip. Should I carefully sand the hull up to the red top coat, apply my barrier coat and then bottom paint. This would seem the easiest, but perhaps the least ideal. i dunno.
    Last edited by carbonsoup; 12-02-2013 at 06:11 PM.

  2. #242
    Join Date
    Sep 2001
    Location
    San Rafael, CA
    Posts
    3,621

    fairing topside - degelcoat bottom

    #1. Imco, prep for painting above the sheer has to go forward with 2-part epoxies.
    Initial repair with epoxy gel, with or withoust chopped strand glass for structural filling.
    There is no other technology that has the versatility of good epoxies for predictable results.

    Cosmetic, ie filling small holes and shallow depressions, ought to be done with
    laminating epoxy mixed with WestSystem's 407 low density powder filler.
    That should be your final fairing and filling.....ready for primer, pin-hole filling, no other flaws.
    Imco, follow that with a sandable epoxy primer. Any number of coats necessary...
    to present the surface to whatever paint system you will use for final color....for show.

    IMCO = 'in my considered opinion'.......
    Using 100% solids, no solvents - no-blush - premium laminating - 2-to-1 epoxy will,
    imco, protect the boat and also protect the coatings you are finishing the boat with.
    100% solids epoxy so there is no out-gassing to screw up your color coats. If you
    use SOLVENT epoxy primers & sandables make sure they cure well beyond what is specified.
    Seriously look into SystemThree's water reducable 2-part epoxy sandable primers.....
    WR-155 works over polyester and epoxy bases, and is compatable with all finish systems,
    so far as I know. No outgassing to screw them up. No VOCs to kill you.
    (Epoxy primers are the transitional chemistry between, in this case, polyester/ vinylester....
    and any finshing emanel or LPU. Imco the best primers are water reducable.)


    #2. I'm not sure that removing gelcoat is necessary for barrier coating the hull.
    The hull is not known for blistering, as the laminations (and gelcoat) were made with
    unadulterated polyester rsisns available in the 60's.
    But since you are....once you are done....suggest covering the hull with a primo white epoxy
    'structural' coating* (not epoxy enamel paint). Depending on how you roll or spray it on
    ....three or four coats. Usually unnecessary to prime the bottom if using industrial coating.
    Before you apply those important epoxy coats, you can fill and fair with the same 407 material
    used topside. Would not recommend any other off shelf powder (but only because I haven't
    used them TMK - 407 is good stuff.......However I will not use West System's toxic laminating epoxy.)
    Don't use Bondo or any polyester filler in the bottom prep.
    Get the ingredients and experiment with your own epoxy formula for a sandable fairing compound.
    Imco it's important that the whole bottom up to the waterline is redundantly epoxy sealed.....
    certainly if the boat is going to spend the next 50 years in the water..

    Assume that if you already have Awlgrip on the topsides the surface would have been prepped
    with epoxy. The topsides most likely would not be stripped of gelcoat. They would have been
    dewaxed & heavily sanded - fairing and filling done with epoxy and appropriate compounds.

    Main reason for the multi-layered epoxy coating after gelcoat sanding or grinding is
    to have a water proof barrier to protect the more water vulnerable original antique polyester....

    second, to create an obvious layer of color that future bottom prep for bottom paint
    will not go beyond. (extra coats so that you won't sand through to the polyester.)

    If the waterline is where you want it, imco, choose the top or bottom of it and stop
    there with your new bottom coating system. Probably the pro that did the prep
    for the topsides Awlgrip went to the bottom of the painted waterline, but stopped his
    spray at his masking tape at the top of the waterline stripe.
    Waterline stripes are commonly painted with one-part non-urethane enamels to allow
    them to be sanded and repainted regularly. Awlgrip cannot take constant immersion.
    Matching, or touch-up re-painting, of existing Awlgrip color is out of the question.
    Use the boot stripe to adjust mistakes. Top line of stripe doesn't have to be straight.

    That's one way to see it!
    Hope we're having fun!
    .................................................. .................................................. .....................................
    * This type of industrial coating will probably have solvents in its formula, or will have
    to be thinned with aromatic solvents. For tutorials and products see www.epoxyproducts.com
    Last edited by ebb; 12-13-2013 at 08:45 AM.

  3. #243
    Join Date
    Sep 2012
    Location
    Philly, PA
    Posts
    179
    ebb, thanks for the update. I was pretty sure about having to continue with 2-part epoxies as getting a proper bond is the only way to make sure she lasts another 50 years... alas, i was hoping there was a magic bullet to help save some time. As far as the barrier coat is concerned, i will continue on grinding away... though I think I may buy a new 8" grinder to help speed the gel coat removal but then stop at the edge of the boot stripe.

  4. #244
    Join Date
    Sep 2012
    Location
    Philly, PA
    Posts
    179
    another couple months pass... and now I am considering getting a trailer. 2.5 hours away after a 6 day work week is impossible. anyone? I could take an existing trailer and add the supports... but that would require trailer building knowledge... sigh. or I could bite the bullet and sink myself deeper into dept and buy a new one from Triad...

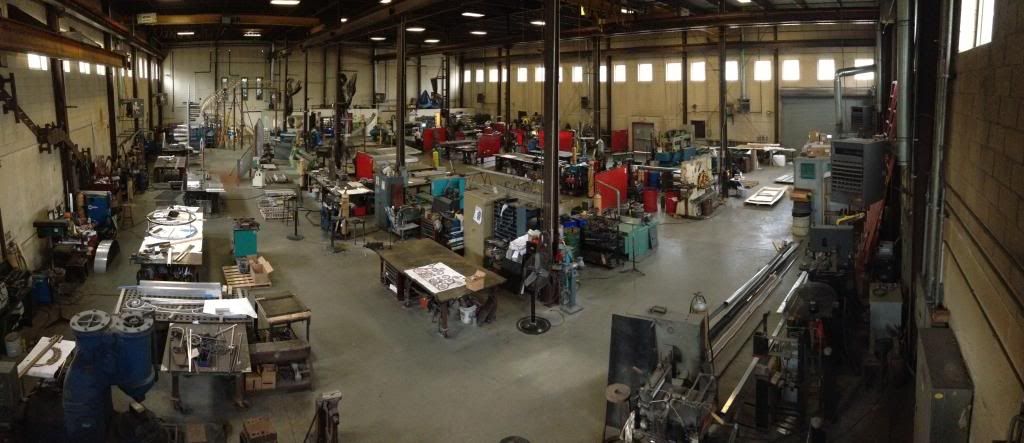
    this is where I have been spending most of my time for the past 8 months...
    Last edited by carbonsoup; 06-29-2014 at 07:51 AM.
    A97 build images, drawings and other data:
    https://drive.google.com/drive/folde...vh?usp=sharing

  5. #245
    Join Date
    Sep 2001
    Location
    San Rafael, CA
    Posts
    3,621

    Wow

    Now THAT is a blinking SHOP ! ! !

  6. #246
    Join Date
    Sep 2012
    Location
    Philly, PA
    Posts
    179
    Quote Originally Posted by ebb View Post
    Now THAT is a blinking SHOP ! ! !
    you are actually only looking at where all the assembly and fabrication happen, there are several other buildlings with waterjet, lasercutters, CNC plasma, 3D breaks, 100 ton presses, powder coating, finishing department..... not really my cup of tea. I have learned a lot, but this place is in it to make money who happens to make metal.
    A97 build images, drawings and other data:
    https://drive.google.com/drive/folde...vh?usp=sharing

  7. #247
    Join Date
    Apr 2008
    Location
    Forsyth GA
    Posts
    396
    Or you could build a simple cradle and rent a flat bed trailer and move it with some help from a friend. It's documented on one of the threads here.

  8. #248
    Join Date
    Sep 2012
    Location
    Philly, PA
    Posts
    179
    Quote Originally Posted by carl291 View Post
    Or you could build a simple cradle and rent a flat bed trailer and move it with some help from a friend. It's documented on one of the threads here.
    hmm. i will look into this. however, it would seem that you need a travel-lift to the boat off the cradle to return the flat bed trailer.
    A97 build images, drawings and other data:
    https://drive.google.com/drive/folde...vh?usp=sharing

  9. #249
    Join Date
    Apr 2008
    Location
    Forsyth GA
    Posts
    396
    Well you don't need a travel lift, a: come-a-long , couple pieces of pipe as a roller and a floor jack is all I use to do this, and I move several of these boats thgis way Ariels Electras etc. Sounds daunting but it is pretty simple.

  10. #250
    Join Date
    Sep 2012
    Location
    Philly, PA
    Posts
    179
    I finally got around to filling in some of the refit data that I have accumulated with Triumph.. I have original hull line drawings, cleaned up vector drawings, plan views, elevations, electric motor cradle drawings, working spreadsheets and other links.

    I would have posted all this stuff here but I made downloadable content so I couldnt make links from my server... Bill, you can repost if you want. I would think that the '1961 Original hull line drawings' might be of interest to you guys as I spent many, many hours cleaning up the 'debris' of 50 years of photocopying and digital reprocessing.

    http://www.carbonsoup.com/A97triumph/?page_id=204

    the rest of the site (and boat!) still have a long way to go...

    best, matt
    A97 build images, drawings and other data:
    https://drive.google.com/drive/folde...vh?usp=sharing

  11. #251
    Join Date
    Sep 2012
    Location
    Philly, PA
    Posts
    179
    hey, i got a trailer! 8k capacity, disk brakes and it was hardly used. jeez, i hope it fits. now, onto building the cradle.


    A97 build images, drawings and other data:
    https://drive.google.com/drive/folde...vh?usp=sharing

  12. #252
    Join Date
    Sep 2001
    Location
    San Rafael, CA
    Posts
    3,621

    Exclamation hope it fits

    Yeah, can see the tape! Hope they fits, too.

    Been to your site. Wonderful CRISP Alberg lines there!
    Aren't they gorgeous!
    I hear music when I see them! Never gets old.

    Miss the view of exterior deck....

    Want some interior shots.

  13. #253
    Join Date
    Apr 2004
    Location
    Pensacola, FL
    Posts
    725

    Wink

    Matt,

    Congrats! But you mint want to flip that thing over, they make a lot of racket when you drag them down the road like that...


    s/v 'Faith'

    1964 Ariel #226
    Link to our travels on Sailfar.net

  14. #254
    Join Date
    Sep 2012
    Location
    Philly, PA
    Posts
    179

    more metal work

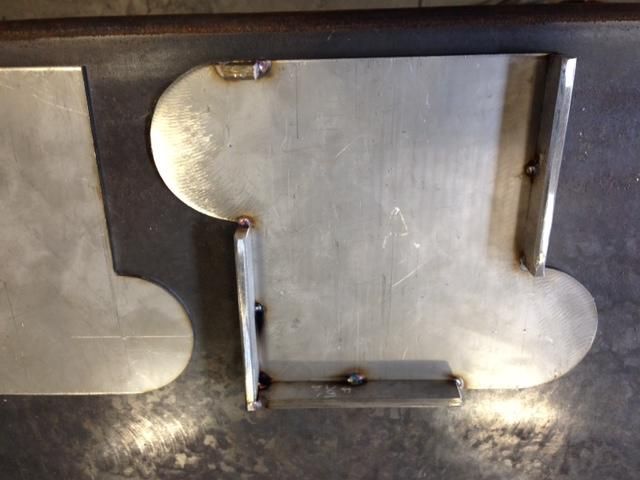
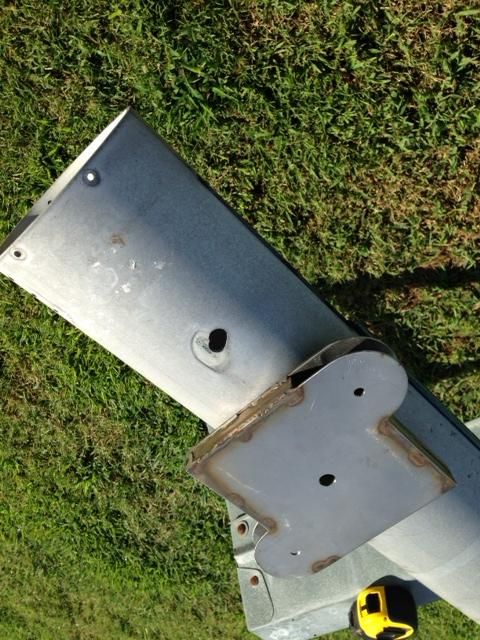
    it would seem that the trickle of work completed on the boat has been related to metal work... I fabricated a new internal halyard masthead sheave block. The design was an evolution of Jerry Carpenter's Destiny's masthead sheave block. This is v.2 where Jerry and Mike (C227) came up with an over/under design so the main halyard sheave is up top and the jib halyard sheave is on bottom. This is to keep the jib halyard from getting in the way of the forestay and jib. As yet, still untested... but the main block is fabricated.


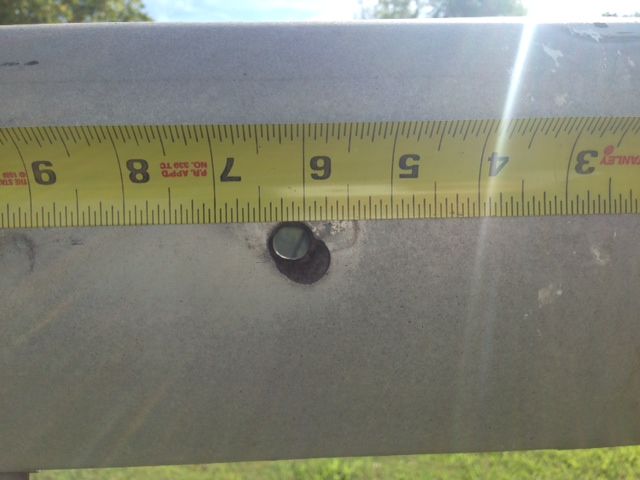
    Upon 'test fitting' I noticed the oblong hole for where the upper shroud attaches to the mast, port side. Interesting that the oblong is only on one side. Anyway, Im not entirely sure what type of cat skinning I intend, as there are a couple different ways to solve this problem.


    I could:
    1. weld up the oblong hole and redrill- this is the cleanest and simplest, except for the fact that I am not the best aluminum welder and where I would be performing such task would be less than optimal.
    2. make a large aluminum patch, say 3" dia with and an appropriate hole, then rivet/screw into place.
    3. drill the oblong hole round and make a shim with a collar for the shroud thru bolt.
    Last edited by carbonsoup; 12-15-2014 at 09:57 PM.
    A97 build images, drawings and other data:
    https://drive.google.com/drive/folde...vh?usp=sharing

  15. #255
    Join Date
    Sep 2012
    Location
    Philly, PA
    Posts
    179
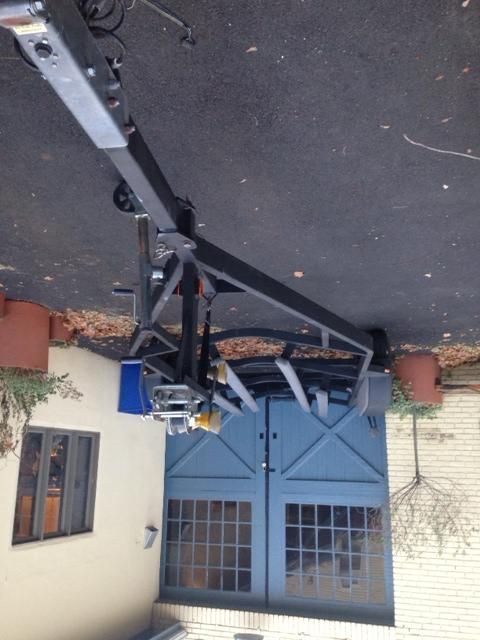
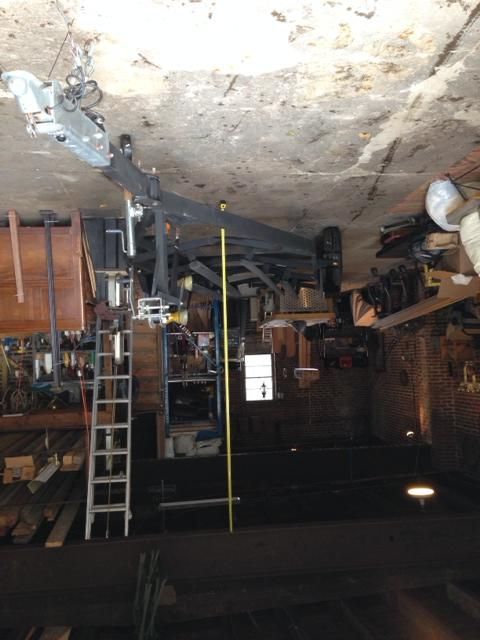
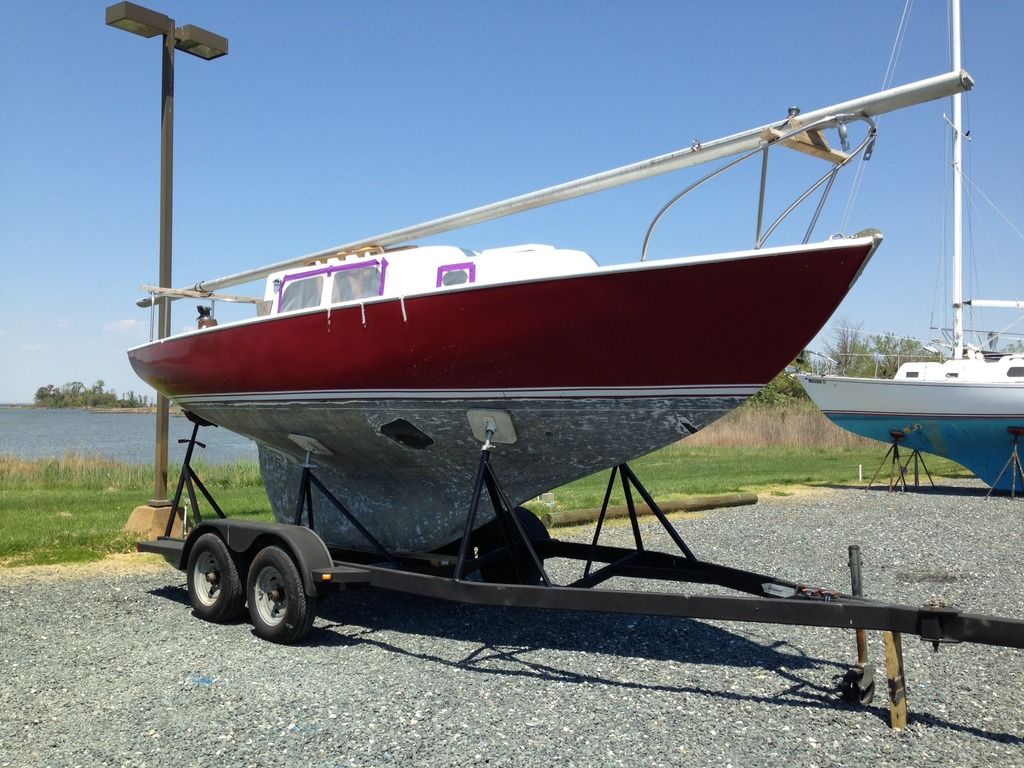
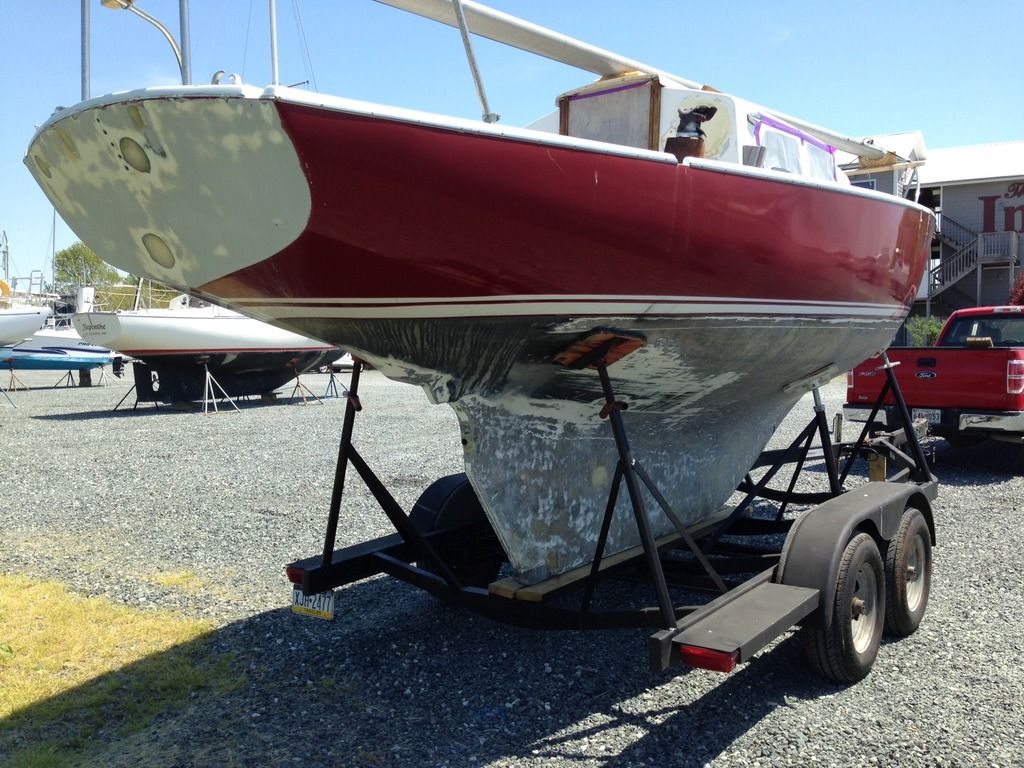
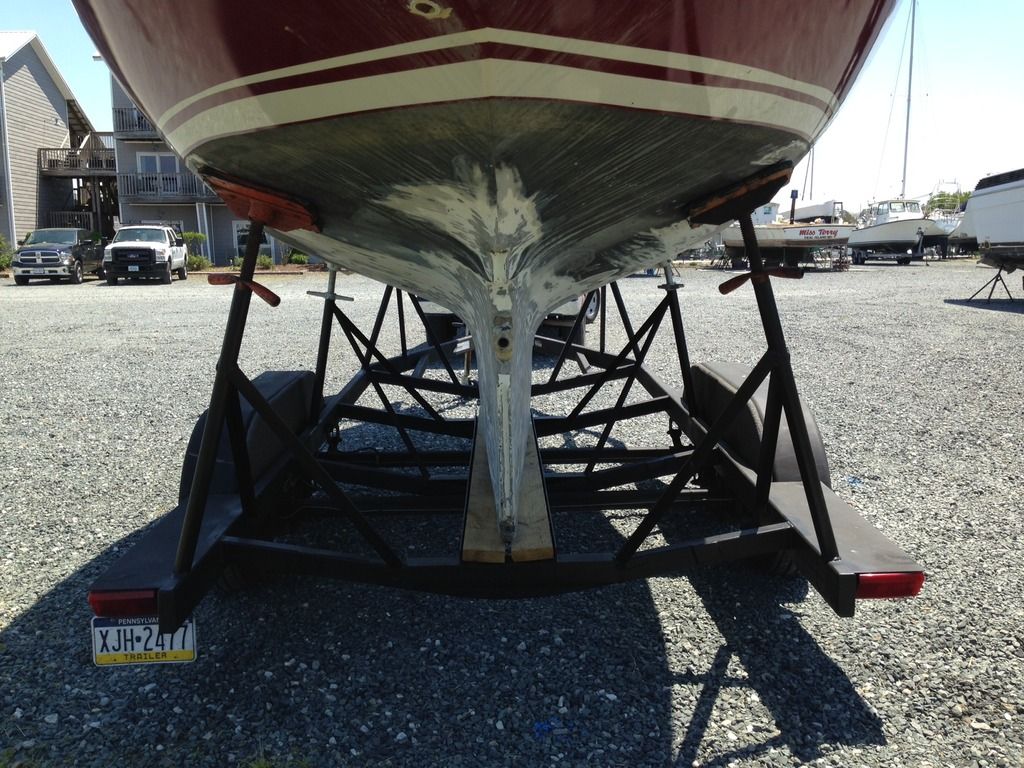
    well, the days pass by and though I have done almost no work on the actual boat... I have finally finished the trailer, which Triumph is comfortably resting upon. This is such a huge milestone for me its hard to describe. Getting the trailer, modifiying the trailer, getting the boat transport guy to move her for the second time (after I already paid 2 years earlier) and then finally paying the local yard to lift her off one trailer and then place mine.... wheew!


    There are a couple things yet left to do to the trailer before she is ready for long distance travel. 1)bow support. I decided to wait until after Triumph was settled onto the trailer to weld on the final support, as I had NO IDEA where to put it... haha. 2) add a couple hook points for oversize tie-downs.


    Last edited by carbonsoup; 05-05-2015 at 04:53 PM.
    A97 build images, drawings and other data:
    https://drive.google.com/drive/folde...vh?usp=sharing

+ Reply to Thread

Posting Permissions

  • You may not post new threads
  • You may not post replies
  • You may not post attachments
  • You may not edit your posts