
Kyle
C-65 Lucky Dawg

Kyle,
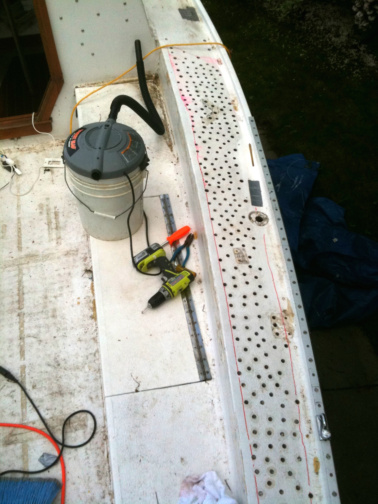
$.02. ... The princess also tapped out fine and when I went to drill out the mounting holes for the combings I had a few that spit out some wet core. The outer skin on those side decks is so thick that even in the worst areas it does not flex under foot. I just let it go on The Princess (being certain that everything was sealed up so it would not worsen) concluding that with the thick skins the core is not needed in that area anyway. on many boats the area between the combing and rubrail is not cored.
I think you could approach it this way:
1. Chuck up an allen wrench with a 90 degree bend in it.
2. Spin that sucker in each of your holes to clear out the mush.
3. vacuum out debris and blow out with compressed air.
4. Douse the area with Isopropyl alcohol to help remove moisture.
5. repeat step #3
6. repeat step #4
7. repeat step #3
8. inject epoxy thickened with something light weight like micro balloons with west system tubes and the $50. Royobi electric caulk gun. (or a regular caulk gun, I heard chicks dig guys with strong hands)
...or just cut the skins off and recore if it makes you feel better. not as bad a job as you might think.
The paste we used on #299's decks was Dura Tech Vinyl ester fairing primer.
Process:
1. Route out all the stress cracks with a 1/8" carbide in a Dremel or air grinder.
2. Knock down the decks with something around 80 grit.
3. roll on the paste working it into all crevices.
4. repeat step #2 and 3 as necessary.
Final knock down should be done with a longboard sander where ever possible.
Mike
C227

Thank for your thoughts and time replying Mike.
I've said it before - I REALLY appreciate this forum. Friends have asked me "How the hell do you know how to do this?" (I decidedly don't...yet) and I just credit y'all as my brain trust: "I have this terrific yacht-specific forum that can answer any question imaginable in a matter of hours." The info is available, I suspect, in other places and I do sample those sources, but I trust you as a group and the friendly, helpful, never-condescending tone of this forum is rarely achieved in other discussion lists. Really a remarkable resource and I can't thank you enough.
So, I feel more comfortable with the swiss cheese approach - though it looks like boat abuse. I also like the idea of using alcohol better than acetone. Cheaper for sure and probably much more earth-friendly. The mush removal worked well today. Not speedy, but seems to be pulling it out easily. For the most part, blowing air through an adjacent hole while balsa-mining worked better than vacuuming. I'm not obsessing about getting everything out - I'm going on the assumption that if I get it bone dry, what is left will just mix with the epoxy and act as filler. This approach maintains the elevation of the deck line - which I feel good about. Haven't checked it, but if there is any arch at all to that surface (or several others I'll tackle) I don't have to bother with recreating it. Estimating epoxy will be a crapshoot, but... learning as I go. Supposed to be warm and dry for the next three days (this is all outdoor work) so I'm hoping to be flexing my forearm muscles with a caulk gun on Tuesday. Thankfully the port side is nothing compared to this.
p.s. My new aluminum mast step is complete and I'll pick it up this week. Will share pix.
Kyle
C-65 Lucky Dawg

Can someone ID this primary winch for me? It isn't the South Coast winch in the background (which, helpfully, is inscribed as such on the top.) It is about twice the size, but hasn't a marking of any sort on its exterior. I want to download a service manual for it before cracking the top off to rebuild it. Another pic in post 55... and 81.
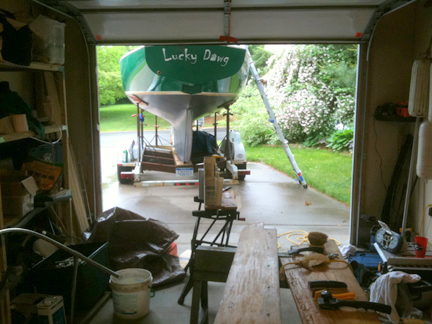
And... a view from the garage. All of the rot has been vacuumed away with an initial batch of epoxy injected. Easier than I thought and required less epoxy than I presumed. Stripping the coaming boards and other brightwork with Bix and curious what the final result will be. Ordered my vinyl-ester primer yesterday. Rolling along.....
Kyle
C-65 Lucky Dawg

I would guess it's a Merriman Brothers or South Coast Company. You might find a mark when you open it up. Freshly lubricated winches will enhance your sailing experience. Great old hardware, perfect for our boat size.
The jib sheet winches on my Ariel are unmarked.
Last edited by Ariel 109; 06-18-2011 at 03:14 AM.

A little progress. Crummy weather has made for a slow go of it on the deck work. I found and drilled out all my wet core. Mostly on stbd, under every stanchion, and at the bow pulpit attachment points. I have the first pass of thickened epoxy in my swiss cheese holes. Would have been easier / a one-step process had I known about release fabric - as each hole has a little concave shape to the surface. (I know, I know... release fabric...) Learning as I go! Anyway, that is slated for this week as the rain will finally go away for a couple days. (The only solace in not being in the water is that sailing-weather days have been few and far between.)
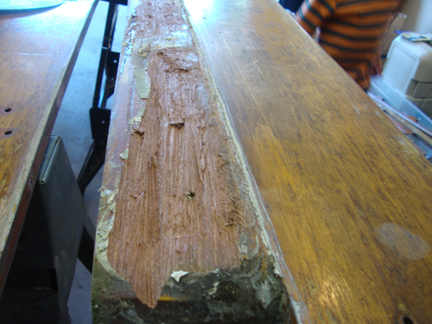
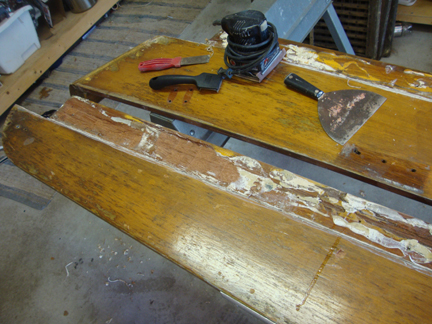
I patched my coaming boards, which had some damage upon removal, with epoxy thickened with the mahogany sawdust from sanding. The dark brown will be hidden, of course, against the cockpit sides. They'd also been patched by a PO here and there with MarineTex and the white looked bad, so I dremeled that out and filled with the same epoxy mixture. It took a lot of Bix slathered on for a lot of time, and then standing on those boards with 40 grit at times to get out the old yellow out. Finally down to nice pink mahogany. Nice weather will also let me initiate my Epifanes. What I have removed won't match the Cetol that is on the cabin door, but I'll address that over the winter. Taking apart the companionway would have added another step that would delay sailing. My family is already tapping their collective feet waiting to splash.
I may break down and rent a nearby airplane hanger to get this done inside - I fear unpredictable showers might treat my vinyl-ester fairing compound, not to mention primer and topcoat poorly
p.s. the color in pics 3 and 4 really is nice and pink like the pieces on the driveway, but doesn't look so in these!
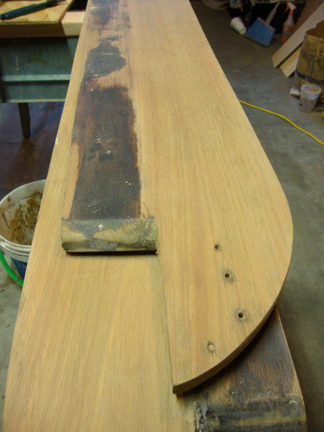
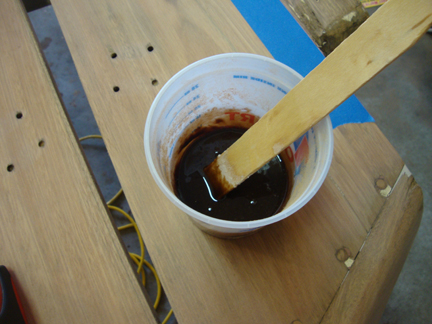
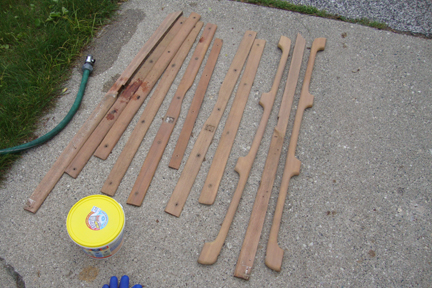
Last edited by Lucky Dawg; 06-27-2011 at 07:34 PM.
Kyle
C-65 Lucky Dawg

Also got my aluminum mast base back from my CNC man. He said most of the expense was in set up, so if anyone is interested in one, let me know. I used Rico's plans to fabricate it.
A thought - is the underside cavity below the screw holes just open like that for filling with water impeding bedding compound?
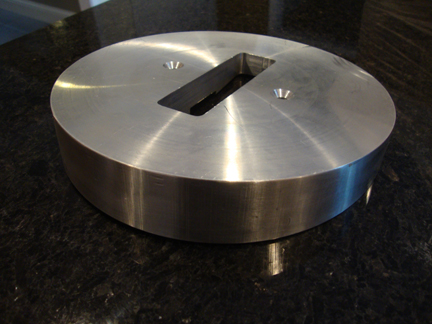
Last edited by Lucky Dawg; 06-27-2024 at 03:46 PM.
Kyle
C-65 Lucky Dawg

Here's one tip - west system release fabric 3.75ft2 for 9 bucks. Nylon drapery backing - slightly firmer feel, but equal performance - 18ft2 for 8 bucks. The latter actually cuts more easily and casts off fewer whispy strings on the edges too.
Kyle
C-65 Lucky Dawg

Kyle , I think you're making great progress on this. The hardest part is over, which is taking the saw and making that first whack on the boat! As you near the end you will be amazed at what you've accomplished. Keep up the great work.You may miss most of the short sailing season but you will have learned a great deal about Lucky Dawg! Carry on!!!

My home has a keel.

Beautiful Base Kyle!!
and great work on the dawg too!
BTW; That cavity on the mast base is necessary for the plate that is welded to the conduit through which the cables are routed from inside the cabin into the mast... This SS assembly is essentilly a 1/16" plate that fits tightly into that cavity and has a about 12" of tube going through the middle. The tube (as installed) extends 6"-8" up into the mast, and about 4" below into the compression post.
The Mast base screws go through holes in the plate fixing it (and the tube/conduit) in place...
I suppose this assembly helps keeps any water in the mast (condensation / rain water) from coming inside. - I have a small water drain-hole in the mast at 2-3 inches above the deck.
So far I've only seen this plate on the Mephisto Cat (C-155) and in no other boats...

My smurf-blue decks (Duratec vinyl ester fairing primer) are sanded down and ready for white Duratec Vinyl Ester primer. I'm thinking that will be Tuesday. I'll sift non-skid into the tacky primer and need to sand the smooth deck for two coats. I'm rolling on these primers, so that makes for some significant sanding. By the way, the people at ExpressComposites.com (Duratec distributor) are SUPER helpful and friendly. Since I am really clueless about what I'm doing (I should say clueless about what I'll be doing NEXT - I now know how to do... what I did...) Anyway, they have humored my questions very patiently. Could be ready for Awlgrip this weekend. Inside a pretty clean warehouse at Torresen's now, I have been working most nights 9 to midnight-ish. It is painful to be doing this work while the sailing season ticks away. I'll post some pictures when I find my doggone camera - it is hiding somewhere very tricky...
If you're interested, I've posted my progress in a Picasa album - https://picasaweb.google.com/1009889...858412/Deckjob# Those are up to moving inside last week.
Thankfully we have access to Amy's folks' 26' Tiara. Its fat 7.4L V8 purrs along nicely - and sucks down more fuel on a sunset cruise than Lucky Dawg does in a season. So, though stinkboating around, we're able to get out and enjoy the water. Some lazy 1-footers on Lake Michigan last night made for a very nice ride.
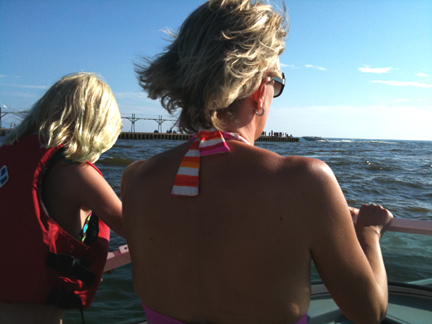
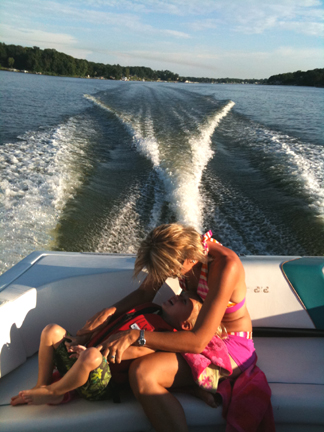
Last edited by Lucky Dawg; 07-24-2011 at 08:42 PM.
Kyle
C-65 Lucky Dawg

F I N A L L Y finished my pre-paint sanding last night at 11:50PM. When I thought I was done last week, I used powdered graphite via a sponge applicator to check my work... UG! Not even close. It very effectively showed all the pin holes. BACK around the whole boat with 80, 110, and 220. All holes gone now. Baby-arse smooth.
I swear I have been sanding for 3 months. I am SO right handed that after all of that, I may now resemble a fiddler crab...
Paint (Interlux Perfection) arrives Thursday. Was going to Awlgrip her, but Torresen's painter urged me towards Perfection - more forgiving, repairable, and a little cheaper.
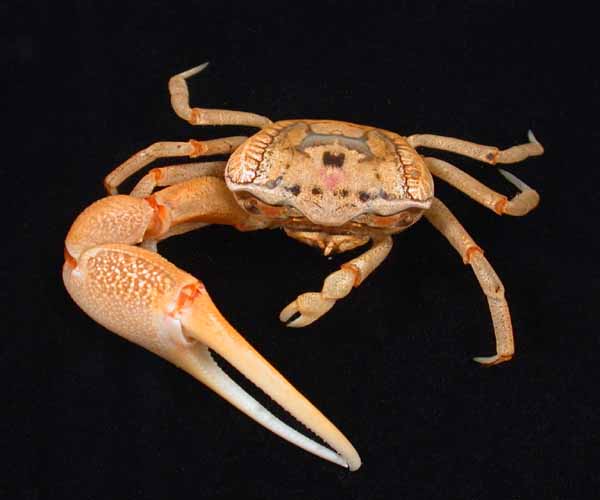
Last edited by Lucky Dawg; 08-09-2011 at 08:26 PM.
Kyle
C-65 Lucky Dawg

This stuff is impressive. You can watch it self-level as you apply it. Initial slight orange-pee l appearance from the foam roller goes glass smooth before your eyes - no tipping necessary. First coat not at all, and I was a little concerned - drips I never saw coming, tiny pimples, weird / uneven coverage. EEEK! Grabbed the painter at my marina today to inspect and he said "Don't worry, that is how the first coat goes on - sand it with 320 and the second coat will amaze you" He was right.
Aiming for an 8/29 sail...
p.s. updated project album is at https://picasaweb.google.com/1009889...858412/Deckjob# Kindly disregard descriptions for non-sailors / non-AC's...
Last edited by Lucky Dawg; 09-03-2011 at 11:08 AM.
Kyle
C-65 Lucky Dawg


Kyle,
Never would have seen your wonderful slide show without your blue line.
Wish there was a way that the whole series, and your comments, could be brought over to this address so that it could be WIKIed in to the Commander/Ariel archives.
I have put Interlux into the same basket as West Marine and West Syetems (Gougeon Bros) BUT
your comments have convinced me to try it myself for the shiney exterior areas on litlgull. Like the self-leveling right-befor-your-eyes and the easy repair.
[EDIT
meant to add, as a 'teaser' for others to view, that I was impressed with your graphite pinhole finder methodShades of CSI
- and your party balloon method along with dacron curtain liner of fairing up a crooked hole
- and that same upholstery liner used as far less expensive "peel ply" release fabric on deck. Great tips!]
Great to meet your crew and Max, who looks like a real character!
Lucky Dawg is definitely a lucky dawg!
BEAUTIFUL JOB ! ! !
Last edited by ebb; 08-17-2011 at 10:04 AM.