


Mea culpa, mea culpa, mea maxima culpa...
A lot of those pictures were on my old, now-defunct 'liquid-epiphany.com' website. Posted 'em there, with the good intention to save some bandwidth for *this* site/Bills wallet. Best laid plans, gone awry - as is not too uncommon... :/ I still have the pics, around somewhere, probably in several places. Which ones in particular were you looking for, Ebb? I could start by taking requests...
Attached are some pics of the beginning of the under-deck strongback area work I'm doing. Started by wrapping the aluminium strongback with plastic wrap to keep epoxy from sticking. Then cut lots and lots of strips of glass cloth, 2.5" wide or so. Between the flat top of the strongback and the curved overhead, were gaps approaching 3/8" at the widest (mid-point of the 3 flat areas across the top. Also, the gap is wider at the after edge, by about double of the front. After much thought and consternation and constipation and, well, delayI am just cramming glass up there until the gaps get closed with a solid layer of cloth. The last layer will get plastic wrap over the top to avoid it sticking to the under-deck skin. At that point, I'll do some cleaning up of this basic structure, grinding edges to make them purtier and fit better, basically get it 95% done, then apply it to the overhead, perhaps with a last layer or two of cloth for that last lil bit...
On to the pics...
This is detail of the top of the strongback, you can see the flatness...
Here's what it looked like after the first layer of goo was on, I started pulling plastic and then thought "Oops, pics...", so replaced it somewhat for this shot..
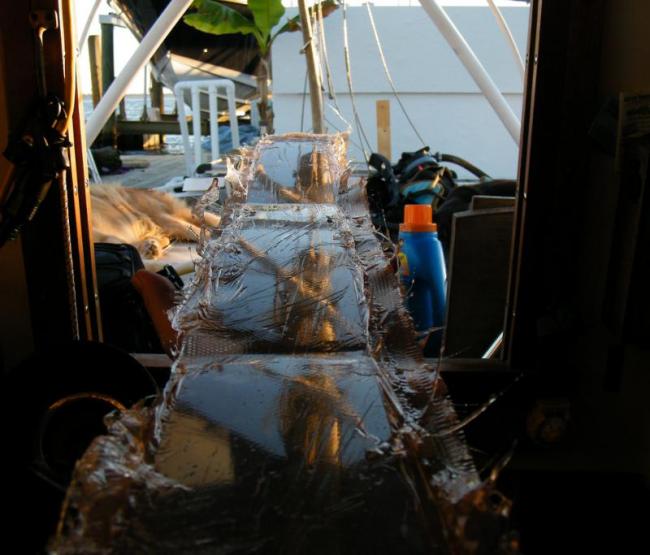
And here you can see that the new structure base has conformed to the top of the strongback - 3 same reflections, 1 for each plane. After this pic, I re-wrapped the strongback, and replaced this structure there as it was still a bit 'green' and flexible, so that it will harden to the true shape. You'll note some dry spots in the fabric - my resin was *cooking*, and I had to rush a bit more than I would have liked, to get things into thin layers so it wouldn't be shot too fast/hard. Good thing is that I will be able to wet that out easily later on...


 Reply With Quote