+ Reply to Thread
Page 6 of 6 FirstFirst 1 2 3 4 5 6
Results 76 to 88 of 88

Thread: Deck joint-Who, What and When

  1. #76
    Join Date
    Sep 2001
    Location
    San Rafael, CA
    Posts
    3,621

    hull/deck reinforcement

    Thinking of the Triton owners I have breakfast with every first Sunday of the month......
    Known as the Alberg Design Fleet of San Francisco Bay ( it's a change-up
    of the S.F. Triton Assoc.) http://albergsailboats.org/about-the...ation/mir.html
    ....there's maybe one skipper who might be persuaded to rehab the seam.
    Remainder are more interested in what to cap over the seam with as a rubrail.
    (which ranges from teak to recycled polyethylene flooring.)
    Some kippers will venture out into the ocean to Drakes Bay, three are planning a voyage to the San Juans in 2014.
    I wonder what they think about the seam.....?
    Rob Bordering is the administrator. And he is someone worth asking about this serious matter.

    On the ADFSFB site look up Alberg Sailboats - Maintenance, Improvements & Restorations
    Which is archived from the now defunct National Triton Association.
    One entry on the seam but it's cosmetic. Haven't searched thoroly.
    Another source might have been TimLackey www.lackeysailing.com/ AND www.triton381.com/
    I don't believe the hull/deck seam issue ever came up.
    Also James Baldwin www.atomvoyages.com/ has a very generous site for cruisers - and has accomplished
    TWO CIRCUMNAVIGATIONS without (so far as I know) a whistle or a whisper about the seam !
    [later EDIT] http://plasticclassicforum.com/forum has a Triton thread. Scroll to bottom of lead page to Miscellaneous Topics.
    150 entries, but nothing specific about the hull/deck seam being a problem.

    Basically, it looks like you will have to choose and invent your own method.


    Obviously, biaxial glass can be used inside up in the cove - if your boat is stripped of everything but the main bulkheads
    (which I personally would NOT rermove.) I'd work around them - especially if your boat is one with a starved hull.
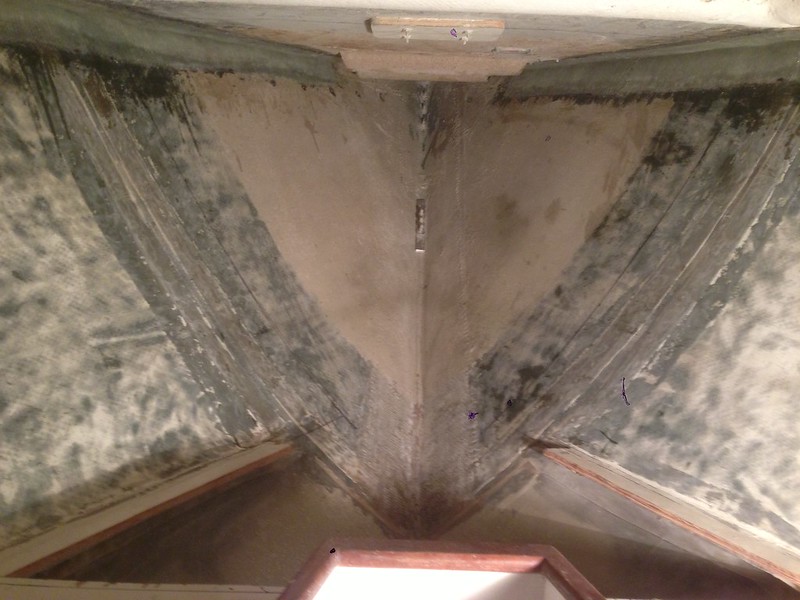
    If you are rennovating the inside with a mind to restoring it, your option is to build up the hull/deck lap seam from outside.

    Clean up the outside seam by grinding and sanding. I'd get it nice clean & crisp with outer lip edge flat and right angled.
    Whatever it protrudes from the hull: 7/8"- 3/4"?, get it fairly equal around the boat. Imco it's OK to reduce how much it sticks out....a little.
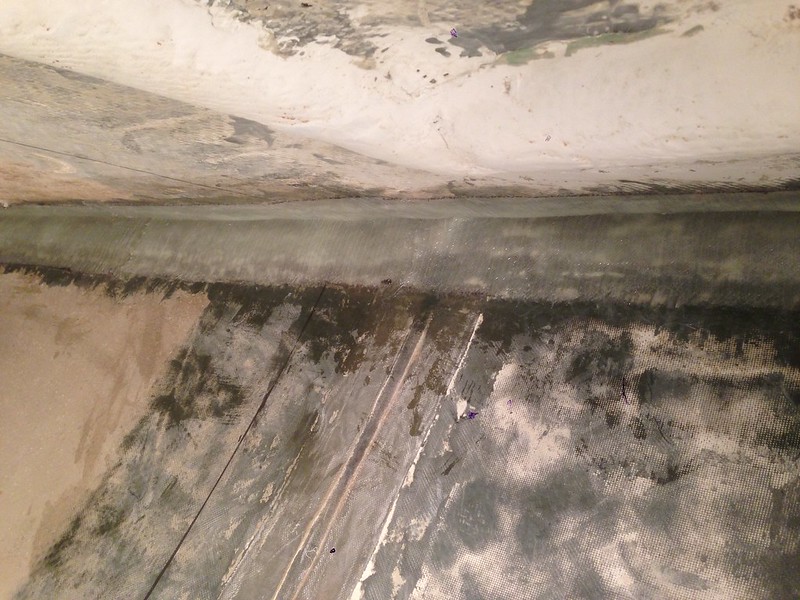
    Then I'd ream the seam....probably with a 1/4" straight bit in a router fitted with a fence.
    Go about half way in only! Then jam it with epoxy, fumed silica, chopped strand paste (after first slathering the open joint with liquid epoxy.)

    That takes care of the seam. Let it set and clean it up. Then it's up to you.
    If you are going to use biaxial tapes, you have to decide to what extent reinforcement you want.
    I think about wrapping the joint from the top of the toerail over the joint protrusion, and stopping at the hull just where it tucks under.
    Seriously consider epoxying in a mahogany filler strip (approx 3/4" x 1 1/2"?) that sits on the protrusion shelf and fills up to top of the rail.

    Round over the wood and bottom lower glass lip ....[Ebb's schedule: tape the first run flat along the wood filler and the lap join, stem to stern.
    Second tape goes from the bottom of the protrusion butted at (NOT turned down) the hull, wraps up over the first tape to the top edge. Biaxial does one turn.
    Third tape goes from the toerail top ( NOT wrapping down to the deck) down over the first two - not tucking under to the hull. Another single turn. Three over the seam. Easy layup, easy to grind off the extras - to fill and fair - and get a clean molded look. Maybe need to use a long sandig board. Extra layer(s) could be added, for instance along the top where track might be added later......Just an idea......
    Going down onto the hull itself is a can of worms. Impossible to fair for Awlgrip. I'd keep the wrap off the hull - AND out of the deck scupper.
    Could add a final woven glass fabric over all... but you can't sand into it. Add back a substitute 'gel coat' of a white epoxy coating, 2 - 3 coats, to finish.

    [A shippy thing to do:] gradually reduce the double lip protrusion (and wood filler strip) toward the bow and stern. Not all the way off!
    Maybe last third of the run toward the bow and last one quarter of the run toward the stern. It's minimal but it'll show. Round edges and wrap.
    The top will be reduced in width going forward and aft, and look mmmm mmmm good, like Alberg would!

    It'll end up overall with a nice wider toerail that can be capped with varnish work.... as some Tritons are already.
    Fair the vertical part of thw new sheer & screw a wood strake on it, OR better, paint it like the hull, like it came from the factory that way.
    Finish it off by adding on half round rubrail, stainless or ipe.

    It's not exactly a feather edged glass job. If Pearson left laminations thin at the top of the hull, backup baxial could be added INSIDE behind the sudden stop of the expanded toerail - layered in graduated widths. Could work imco. Good luck.
    Last edited by ebb; 01-02-2014 at 10:52 AM.

  2. #77
    Join Date
    Mar 2010
    Location
    Orinda, CA
    Posts
    31
    Happy Holidays Everyone!

    Ebb, you made a compelling argument and offered a great technical solution for external tabbing as a solution for externally flanged hull deck joints such as the west coast Tritons. If the particulars of my Triton and the sequence of restoration projects had been different I would seriously consider this option. Alas, that is not the case. I am moving forward with internal tabbing as an alternative solution.

    Having almost completed the project in the lazarette and v-berth I have learned and relearned some of the lessons I want to share with others who might be considering a project like this.

    1. As much as possible improve the project working condition by getting the right tools, the best eye, ear, and breathing protection equipment you can afford in advance of starting the project. Grinding fiberglass in the lazarette and v-berth is a miserable job. Do your best to make the condition as tolerable as possible. Ebb and Tony already mentioned some of the ideas. I used DeWalt angle grinder that I already have and I wish I could afford the Italian angle grinder that Ebb mentioned but it costs almost $600. One tool that help me a lot in grinding out the toe rail cavity is the 6 inch coarse wire wheel. No other tool could reach that area. Thanks Tony for that idea!

    2. After cleaning up wet out the joint with epoxy AND, very importantly, smooth out the existing tabbing edges and uneven spots with thickened epoxy. Unless you are extremely fortunate there will be many areas that need to be evened out. I did not do a thorough job of it in the lazarette and ended up with a couple of air pockets which you want to avoid. It would also be very helpful when you wet out the fiberglass to lightly coat it with slightly thickened epoxy. West System book mentioned this point which I did not thoroughly appreciate why until now. It make the bonding with existing glass so much more stronger, especially you are glassing the tabbing upside down.

    3. I would also avoid 1708 bixial tape without the mat backing. I strongly prefer 1808 with mat backing. The 1708, when wet out, becomes a limp soggy mess whereas the 1808 has a lot more structure and is much easier to massage into the awkward space in the toe rail cavity. I also believe the 1808 is a lot stronger. Ironically, I paid $28 for 2 yards of 1708 at Svendsens and only $24 for 2 yards of 1808 at Tap Plastics.

    Here are a few pictures of the finished internal tabbings in the v-berth. As you can see I removed the original anchor locker bulkhead. The lower part of the plywood has signs of rotting and delamination. I plan to move the bulkhead forward 6 inches to make the v-berth more hospitable for taller people as the existing v-berth is only 6 feet long. Not the least it makes the tabbing project so much easier. I cannot imagine grinding fiberglass wedged inside the anchor locker.

    One more detail to note - careful reader might notice that the upper and lower edges of the fiberglass tape are not even in some spots. It is not because I did not cut the tape evenly, the tapes are exactly 6 inches in the first layer and 8 inches in the second layer. They are uneven because the toe rail cavities are not uniform. Some areas the cavity goes all the way up, other areas the cavity is very shallow, all depends on how well the original factory worker applied the original glass job. This is another reason why internal tabbing is easier because no one will see the uneven finish. I am sure Ebb and Tony would have gone back and finished the edge just so perfectly. But craftsman like Ebb and Tony I am not. I am just a sailor who is trying to make his boat more seaworthy.


  3. #78
    Join Date
    Sep 2001
    Location
    San Rafael, CA
    Posts
    3,621

    Great tabbing

    Can't see that it looks uneven. Don't know how many laminations you have there,
    but if your hull is as skinny as my Ariel, which is/was about 1/8" at the sheer -
    with the deck lam a little thicker in the turn of the toerail to the seam -
    it wouldn't hurt to add a wider tape to build up the hull.

    [Just looked back at Tim's surgery of his day sailor that you posted here = pg 3 #54.
    For the first time SEE that the Triton hull/deck seam in his photo is a BUTT-JOINT.
    Not the usual out-turned Wesy Coast Triton lap join we are talking about.
    His text says that what we're looking at is 1/4" laminations - but it sure looks thicker than that.
    It's obvious we are looking at an early version of the joint that all Ariels and Commanders have.
    The apparent thickness of the lams we see may be due to the build-up of added glass tape or most likely glass matt that supposedly bonds the hull/deck seam.
    Part of the illusion of thickness is due to the way the deck is constructed.
    It's amazing what the lamination in way of the toerail was asked to do while gluing that deck
    (and the whole cabin/cockpit structure..... the whole top of 600(?) East Coast Tritons......with some piddley strips of glass matt.]

    The deck, of course, gets much thicker going inboard, because it's stiffened with mutiple lams of glass and/or plywood. [Balsa core on A/Cs]
    So, complimentary build-up along the sheer, just below the sheer on the hull, might be wise.
    Also, when you add back the anchor locker, you can extend wider tabbing on to the hull. Both from the bulkhead and also imco in adding strapping to prevent photgraphing (bulging) of the bulkhead on to hull* - that is if your hull is truly skinny.

    You will be adding color back in the form of epoxy sealer over the polyester.
    If you are living onboard for extended times, you might be adding insulation (Ariel discussion forum.)
    .................................................. .................................................. .................................................. ..................................................
    * this pre-tabbing is strickly an idea. Haven't done this myself in way of a bulkhead on A338.
    Did add in a full "crash bulkhead" between the mastbeam bulkhead and the anchor-locker blkhd.
    Did not strap the hull first with layered tapes, but probably should have. Don't believe it's standard practice even on 'oil canning' hulls.
    Felt at the time that the photographing of bulkheads and stringers so evident on the Ariel 338 hull, happened when the boat was newly being laminated and assembled.
    Thinking was at that time that the new blkhd installed with spread out glass tapes wouldn't be prone to expressing itself thru the old fiberglass. Not so sure, now. Hate to have it show up as a shadowy ripple in the glossy topsides.

    Am sure that any glass sailboat in its life is subject to TWISTING - and major events are expressed in unintentional seams zippering open and laminations peeling apart. That's how I interpret what we see in your photos, pg3 #48.
    Am not an engineer. Is it possible
    that new construction in an old production fiberglass boat can print through? The "print" being a future zipper disaster waiting to happen?
    50 year old plastic is about as hard as it's ever going to get....but the boat is wearing, getting older, getting brittle..... compared with the very same newly laminated hull back in the 1960s.... that had give to it, even tho the frp was set.
    It's expensive to err on the side of caution.....with high priced resins & fabrics. Extra reinforcements has to be good for the boat..... and the brain......
    Last edited by ebb; 01-02-2014 at 10:58 AM.

  4. #79
    Join Date
    Mar 2010
    Location
    Orinda, CA
    Posts
    31
    Ebb wrote:
    [Just looked back at Tim's surgery of his day sailor that you posted here = pg 3 #54.
    For the first time SEE that the Triton hull/deck seam in his photo is a BUTT-JOINT. Not the usual protruding Triton lap join we are talking about.
    His text says that what we're looking at is 1/4" laminations - but it sure looks thicker than that.
    It's obvious we are looking at an early version of the joint that all Ariels and Commanders have...
    As far as I know east coast Triton hull deck are joined together via butt-joint and west coast Triton have externally flanged hull deck joints.

    So, complimentary build-up along the sheer, just below the sheer on the hull, might be wise.
    Also, when you add back the anchor locker, you can extend wider tabbing on to the hull. Both from the bulkhead and also imco in adding strapping to prevent photgraphing (bulging) of the bulkhead on to hull* - that is if your hull is truly skinny.
    I debated as to how many layers to add to the existing internal tabbing. I initially thought of adding three layers but after grinding/cleaning the hull deck joint in the v-berth I felt better about it. I decided to go with two layers of biaxial. As mentioned in the previoius post the first layer used is 1708 without mat backing and the second layer uses is 1808 with mat backing. This adds approximately 1/8" total thickness to the hull in the gunwale area. Based on what I have seen the hull thickness near the gunwale is approximately 1/4" that Tim mentioned in his day sailor project.

    You will be adding color back in the form of epoxy sealer over the polyester.
    If you are living onboard for extended times, you might be adding insulation (Ariel discussion forum.)
    Yes, definitely plan to paint the v-berth after the bulkhead goes back in. I also plan to add wood ceiling to finish the hull with insulation underneath it.

    The project scope is creeping though. I just ripped out the v-berth itself to enable access to add a 30 gal water tank. Also replacing the original longitudinal forward lower chainplate knees with athwartship knees made of g-10. When completely glassed in to the hull and underside of the deck it will further strengthen the hull deck joint. I already mentioned that the bulkhead is being moved forward by 6 inches. Looks like I won't be sailing for a few months.
    Last edited by Triton106; 12-29-2013 at 09:56 PM.

  5. #80
    Join Date
    Sep 2001
    Location
    San Rafael, CA
    Posts
    3,621

    Question What kept VentoDea from sinking?

    Happy New Year!
    Sounds like Plan, Progress and forensic photos always appreciated!
    I think beefing up the inside in way of the hul/deck seam on our early Pearson classic plastics, while not the easiest, finishes up the cleanest looking when all is done.

    Most of the ADFSF Breakfast Club have boats and agendas that won't include either an interior or exterior upgrade.
    Do think a fix is possible and doable without disturbing the inside.
    Took a drawing of the exterior biaxial idea for the West Coast Triton to the meeting and passed it around.
    Added two more biaxial tape wraps to the model, making for five layers.
    Didn't get much discussion....pretty used to that.
    Can understand that to focus on something so basic as a hull/deck seam on Sunday morning
    doesn't fire up the imagination. But, believe bringing to attentionm is important.

    Short exchanges between oatmeal and eggs about what might have caused it....someone said the huge dent in VentDea's hull showed scrape damage in it ....and thought the boat had been hit by a log or something. Good possibility! There goes my twisted banana hypothesis.
    The cause of the terrible damage to the boat seemed transfered to something IN the water rather than the water itself. To me, the grade of cause isn't the problem. A boat could be squeezed inadvertantly when sharing a canal lock with a steel monster.,,,,and crippled.
    The integrity of the frp monoque structure of our boats (with reinforced seams and backup structures that support the skin)
    will do a lot to protect the boat from unusual events.....whether they're freak waves, hitting logs at speed, or surving groundings and other hard places.

    As someone said about our current weather: It'l be the same weather as always, just more extreme:
    hotter summers, colder winters, longer droughts, bigger floods, colossal hurricanes, tornados, earthquakes, tsunamis and freak waves.
    The only smart thing we do is increase chances of survival.
    Back up our compromises.


    Our little one-to-one ballast to displacement cruisers.... if they run into a problem, that problem can instantly become disaster.
    Went to the VentoDea blog: 3 Knots / Man, Wife and Dog drifting to warmer climates - 3-knots.com/ (link on Atomvoyages.com/)

    NEARLY THE WHOLE LENGTH OF THE BOAT ON THE PORT SIDE HAD BEEN PUSHED IN ABOUT A FOOT.

    Jerrad: "The disbelief didn't last more than moment before we began tp assess our situation.
    There was a four foot diameter dent in the side of the hull.
    The hull itself had been separated from the deck and pushed in about a foot - nearly the whole length of the boat on the port side.
    There was delamination at the waterline.
    We had no electricity, no GPS, no radio, our paper charts were destroyed.
    The window on the lee side had been blown into the boat from the pressure as we rolled.
    The permanent shelves and bulkheads had been blown clean off the hull.
    The tiller had been broken off, one of the chainplates pulled off. [assume the mast survived - probably because they didn't 360.]

    The kayak was split in two, we had maybe 2 hours of sunlight and it was still blowing a gale.
    I had a feeling that it was going to be a long night."
    They had 3 feet of water in the cabin that Jarrad's partner Josie managed to hand pump out!

    They ended up close to shore where they were intercepted by the Columbian Coast Guard and towed in.
    The Triton was declared a total loss by Columbian Customs and abandoned in Columbia. (VentoDea RIP)
    Their dinghy and been split in two! (No mention of a life raft.)

    Just suppose it had been dark.
    Suppose your raft cannister had been stripped off by the comber and lost, and your dinghy smashed....
    Our boats when they get enough water in them.... just go to the bottom....they don't float.
    Wonder how many more gallons - or cups - would have settled VentoDea low enough for waves to come onboard?


    Can't Happen To Me!
    Last edited by ebb; 01-10-2014 at 09:01 AM.

  6. #81
    Join Date
    Sep 2001
    Location
    San Rafael, CA
    Posts
    3,621

    Lightbulb Stitching VentoDea's Seam

    Joshua Slocum found Spray languishing in a Gloucester field. Shortened it by cutting the middle out. Rigged it and went sailing.
    Don't know if he had help, but the boat was 38 feet, wasn't it? I've always thought that guys and gals in the old days had more stamina, more wear-with-all, piss and vinegar and plain guts. Harry Pidgeon was another...built his boat from the keel up.... and also circumnavigated the planet!

    Probably too late now. But an enterprising soul of quality might have rescued VentoDea languishing somewhere on a Columbian dock.

    The boat spent 50 or more years being a Triton.
    The 4' diameter dent can be popped back out to its former curve. The port seam can be jimmied and jacked back out to the deck line. Then, temporaryly bulkheaded and spot welded with epoxy back to it's former sweet Albergian sheer.

    Woke up this AM thinking of ways it might be done. First, prop the boat up on its keel and proceed to push (and pull) the portside back out. Then see if the deck and hull can be married back to it's lines. Line up the seam like it was and stitch it tight with wire and rope and clamps.
    Important to get the port side hull as fair as possible with props, temporoary glued in blkhds - before filling the toe-rail seam.

    Then build two circular cradles out of twoby and plywood so the boat can be ROLLED. Doesn't matter how the cradle is attached to the hull and deck....tab it on if necessary!
    Cut holes for twoby straight thru both sides of the hull above the ballast and tie the cradle together there. Cross connect over deck or holes thru cabin. Patch holes later.
    With all that weight to roll, it'll take a bit of planning and levering.

    If the ballast is external (not encapsulated) then it could be removed.
    It probably should have had its bolts replaced anyway...before it began any voyage. Certainly easier to roll the boat without its ballast.

    The idea is to get the toerail positioned so that it can be worked without having grinding dust and epoxy in your face.. Less than 90% over on its side would be enough. Internal cross support needs planning when rolling boat onto its wounded side.
    For this, it's worth the effort building a strong rolling cradle.
    Assuming there is access to a greater part of the seam while keeping (at least temporaryly) most of the existing minor bulkheading and furniture in place. Get biaxial fabric and laminating epoxy together.
    Then maybe roll up narrow logs of biax and epoxy, jam them into the cove of the toerail.
    Prop pvc pipe wrapped in seran against the fill to make a large fillet curve in the corner.
    Then, lay on the strips of fabric that tie the seam deck to hull.

    (.....think I hear VentoDea calling.....)

    I've had to leave the marina at times when lein sale boats - that hadn't made the cut - were towed in FLOATING, strung together like exhausted horses - where they were doomed to be butchered, and dumpt in a landfill. A338 is lined up along a fence on the hard with a bunch of others. Many in the beginning had flurries of restoration. Now sit neglected.... waiting for their owners to come back again....maybe never.

    A small percentage of those boats make it out of the yard to sail far again.
    If VentoDea hasn't been trashed, with some effort she could feel the wind dipping her rail again....seamlessly!

    Thing is, VentoDea the Triton, crippled as she was, got the 3-Knots band safely back to land - had the good will and stamina to get her people and the dog to safety....
    Last edited by ebb; 01-08-2014 at 09:42 AM.

  7. #82
    Join Date
    Mar 2010
    Location
    Orinda, CA
    Posts
    31
    Ebb wrote -

    Joshua Slocum found Spray languishing in a Gloucester field. Shortened it by cutting the middle out. Rigged it and went sailing.
    Don't know if he had help, but the boat was 38 feet, wasn't it? I've always thought that guys and gals in the old days had more stamina, more wear-with-all, piss and vinegar and plain guts. Harry Pidgeon was another...built his boat from the keel up.... and also circumnavigated the planet!
    I recent re-read Joshua Slocum's classic "Sailing Alone Around the World". I am pretty sure he did no have help (not in any material way) in rebuilding Spray. What's more amazing is that he took on the process from cutting the trees for lumber to making the spars. Not only, he sailed alone through Magellan Strait while outsmarting the cunning natives without any autopilot, or engine, or radar. Honestly, I don't think there are that many people who could accomplish such a feat, in the past or present.

    Harry Pidegon, the second person to solo circumnavigate the world, is equally impressive. Not the least of which is that he is the first one to circumnavigate twice, two and half times to be more exact.

    Ebb wrote -

    A small percentage of those boats make it out of the yard to sail far again.
    If VentoDea hasn't been trashed, with some effort she could feel the wind dipping her rail again....seamlessly!

    Thing is, VentoDea the Triton, crippled as she was, got the 3-Knots band safely back to land - had the good will and stamina to get her people and the dog to safety....
    As tough as Tritons are I don't think Vento Dea's owners could have survived if they were hit by a second freak wave. They were fortunate that the sea was relatively calm after the accident and they were close to the shoreline and are young and tough. I share your sentiment for saving every worthy plastic classics. At the same time I completely understand that sometimes economics just don't permit it. In this case, the boat is in some remote Colombia shore without any real marine facilities, supplies, or even reliable supply of electricity. It will be an extremely challenging rescue project for anyone to take on. In the mean time there are many boats available at lien sales for a song. It would be much more economical to buy a lien sale boat and restore it than to fly to Colombia and pay for housing and maybe even government fees to take over the ownership of the boat and import duties for all of the supplies and parts.

    In the meantime v-berth project on Blossom continues. I have glassed in the new bulkhead with two layers of biaxial tape on each side. I have also installed and glassed in chainplate knees athwartship. Currently waiting for the new water tank to arrive (Ronco model B126 fits perfectly under Triton v-berth). I will be posting more progress pictures shortly, maybe on a separate thread since some of it maybe unrelated to the subject topic of this thread.

  8. #83
    Join Date
    Sep 2001
    Location
    San Rafael, CA
    Posts
    3,621

    RE Blossom

    What you are doing for her is fantastic!
    As intimated, your focus of concern, obviously for you and your family,
    but also for the Triton is exceptional.
    It's rare, only a few have the resolve to really get into the three 'Re's:
    Restore, Renovate, Refurbrish.

    From 1959 to 1968 "over 700" East Coast Triton's built by Pearson.
    "Thought to be around 125"..... West Coast Tritons built by Aeromarine Plastics in Sausalito.
    "At least three built by Jouet in France.
    http://bluewaterboats.org/pearson-triton-28/
    Wonder just how many of these at least half century old relics are still around? Not a whole lot to begin with.

    There's historical significance in that Triton is Alberg's first launch into dozens of classic plastics that earned him fame.....
    the one that started it all.
    Of the 800 'or so' Tritons, how many are still sailing? How many sitting in a field somewhere? Might be frightening to know.

    Given Triton's place in maritime cultural history, and in the minds of dreamers, reviving a damaged Triton is as honorable and
    excellent a calling any sailor can take on. Take to heart.


    Yes, the 4-Knots (including their Triton) were all very lucky indeed. But that's the message....the vessel DID bring them to safety.
    That second strike didn't happen to them. Would you say, a little magic? Or in Alberg's lines, there's magic.
    Reinforcements for Blossom... to make sure it can't happen again... will be studied by others with sailboats worthy of saving and working on.
    not just early Pearson Alberg's with leaky seams. Despite nay sayers ('a log did irt') the age of the boat alone makes re-doing the seam imperative.

    In the mean time, we hoist a few to...... VentoDea!
    Suggest you start a Gallery page, hopefully here with Bill's blessing, and give us all the photos you can.
    Last edited by ebb; 01-09-2014 at 02:23 PM.

  9. #84
    Join Date
    Sep 2001
    Location
    Orinda, California
    Posts
    2,311
    Ebb, because it's not an Ariel or Commander, posting an "Off Topic" notice to come and look at the Triton's Web page when there's something new is how we can handle this.

  10. #85
    Join Date
    Sep 2001
    Location
    San Rafael, CA
    Posts
    3,621

    Too Bad

    Triton's Web Page
    The new ADFSFB (Alberg Design Fleet of San Francisco Bay*) site is not fully together yet,
    and probably never will have an interactive discussion forum function.
    http://albergsailboats.org/about-the...sco-fleet.html

    This thread has attracted only 6900 hits, certainly not the most popular subject in this forum.
    And sadly, ever since Triton106 revitalized this thread - except for Scott and TonyG - no contributions from other owners.
    And the subject is difficult. But it is, so far as I have found, the only internet site that talks about
    the Alberg/Pearson HULL/DECK SEAM anomaly.

    I'd guess that Ray will be able to post his rehab pictures there in a project pool bulletin board kind of thing.
    However, it's not what anyone could call live, open, or interactive. And probably not even searchable by google.
    Think that's too bad.
    Hope he creates his own web site or blog, if his Triton is not welcome here.

    This crab will reef his sails and go below. Bye.
    (why does reciprocity seem to be social failure here?)
    .................................................. .................................................. .................................................. ................................
    "Formally known as the Triton One-Design Fleet of San Francisco (TODSF), our board of directors RECOGNIZED THE COMMON INTERESTS AND CONCERNS THAT ALL ALBERG OWNERS SHARE, and decided to expand the club's charter to include any boat designed by Carl Alberg." etc
    Last edited by ebb; 03-17-2014 at 08:51 AM.

  11. #86
    Join Date
    Aug 2015
    Location
    Skaneateles, NY
    Posts
    8

    Bulkhead reinforcement/Shelf joint

    I recently discovered ponding on the inside shelves on my CP#162 and believe I need to reseal the deck seam. Some of the shelving near the bulkhead is soft and needs replacing. My question is regarding the bulkheads that the chain plates mount to. First, what are they made of? Second, what is the inside rail beneath the shelves made of? and third, Do the bulkheads that the chain plates bolt to (that is glassed to the shelves) need to be glassed to the shelf for further strength or can the shelf be removed under it. (and add length to the bulkhead for added strength?

    Thanks,
    Rob

  12. #87
    Join Date
    Sep 2001
    Location
    Santa Cruz, California
    Posts
    461
    The two bulkheads that define the forward end of the main salon and the aft end of the V berth area on my boat (Ariel #330) are both made of plywood. In 2004, I removed the standing rig and the original badly corroded chainplates. Over the years, leaks at the chainplate slots had caused water damage to the deck at the chainplate slots and at the top of the bulkheads and also to the bulkheads where the bolts holes penetrated the bulkheads.

    I enlarged the bolt holes in the bulkheads and augured out the bad wood between the upper and lower laminations of the deck, I then filled these areas with epoxy and or fiberglass. I also removed all soft wood in the bulkheads and repaired these areas with fiberglass. I purchased new 306 stainless steel chainplates and bolts and installed them. The new bolt holes were drilled throug the enlarged epoxy or fiberglass filled holes, so there is no plywood to bolt contact. Also, the top of those two bulkheads on my boat were not taped to the underside of the deck, so I did that as well.

    With the help of a professional, the strong back beneath the mast on my boat was rebuilt at the same time. I have documented the stong back project elsewhere in this forum. Also, you can visit my webpage on that project. That web page provides photo documentation of the strong back project: http://www.solopublications.com/sailarir.htm.

    My strong back upgrade was unpopular with some contributors to this forum, but in my opinion and in the opinion fo the professional who designed and completed the project, it was the right solution for the problem that my boat was experiencing. It has been 19 years since that work was completed, and the reinforced stongback has performed very well in the Monterey Bay and Pacific Ocean environments where I sail my boat.

    I have not experienced soft wood in the port or starboard V berth shelves or in the port side storage cabinets, So I can't say for certain what kind of wood those shelve are made of, but I have assumed that are also mode of plywood.

    By the way, I have taken photos beneath the deck of cabin sole, which demonstrate that the plywood used in that area is labeled as AC plywood and not as marine plywood. (Please see attached photo.) When I removed some of the formica covering the bulkhead at the forward end of the main salon, I discovered prominent voids in the plywood, So if the top edges of your bulkheads are not sealed in some way, water entering that area may find its way down through the voids in the plywood. This could result in more than cosmetic damage to the bulkheads.

    I also removed and re-bedded the the rub rail and re-bedded the hull desk joint in 2002 shortly after purchasing the boat. That was a major project that took a number of weeks. A prior owner had removed the original caulk and replaced it with what appeared to be silicon caulk. I had to remove that material from the seam, and then clean the joint with solvent. My hull/deck seam is now bedded with 3M 5200. The hull deck joint is gassed over with roving and mat on the inside of the boat. The joint itself was not leaking into the cabin on my boat, however, a prior owner had re-fastened the rub rail with long screws that penetrated the seam, and the roving and mat as well. The protruding screws were rusted, and rust stains ran down there inside of the hull, I filled all of those screw holes with epoxy from both the cabin side and from the outside of the hull. I then rebedded the hull deck seam with 3M 5200. I used 3M 4200 to bed the rub rail, which I also fastened with shorter screws that did not permit water intrusion.

    Even with a sound and well sealed hull to deck joint, you may and probably will experience some puddling of rain water on the V Berth shelves near the chainplates. The key to stopping that problem (at least temporarily) is an annual or semiannual re-bedding of the chain plate covers to prevent rain water from entering the chainplate slots. I use a polysulfide caulk for this purpose.

    As far as removing the shelves in the V Berth area, I do not know whether those shelves are designed to stiffen the hull, but they probably do provide some structural reinforcement. You might write to Ebb. Ebb has done seem extensive redesign and rebuilding of the interior of his Ariel, which is well documented on this forum.
    Last edited by Scott Galloway; 10-30-2023 at 08:59 PM. Reason: add photo
    Scott

  13. #88
    Join Date
    Aug 2015
    Location
    Skaneateles, NY
    Posts
    8
    Thank you Scott. I will look up Ebb's stuff. I would post a few pictures but I'm not sure how

+ Reply to Thread

Posting Permissions

  • You may not post new threads
  • You may not post replies
  • You may not post attachments
  • You may not edit your posts