


But I do have to admit I have not been around here for some time.
Fall has finally come to Florida and the weather is much better for working on Destiny. When the summer temperatures were 95 degrees every day with 95% humidity (the normal Florida summer weather for about 5 months straight) I have a hard time forcing myself out in the heat to work. And my epoxy allergy forces me to cover up which makes the heat even less inviting. But I have 4 or 5 months of good temperatures ahead of me now so it's back to work.
I have made progress on several fronts since I last posted. The deck recore is completely done now (I'll show some pics of that job in a future post) and I have finished something that was a bit of a challenge to my skills (which means I really enjoyed doing it) Destiny's forward hatch. I wanted to build a frame around the hatch to have something to attach the hardware to and to make it look better.
As I started looking at what I would have to do to make the frame I realized all 4 sides of the opening were different. And the only way I could come up with to make the frame fit the ceiling correctly was to make some 1/4" thick strips and spread glue between them in groups of three and clamp them to the bottom side of the deck around the opening. First I did the 2 sides and after taking them down I did the forward and aft sides of the opening.
Now I had the 4 pieces that would make up the frame in a very rough form. I shaped them enough so I could cut mortises where the frame parts came together and used loose tenons to join the 4 pieces together. At this point I had a very rough frame that all 4 sides curved at a different radius. The center of the frame was smaller than the opening in the deck for the hatch which was by design.
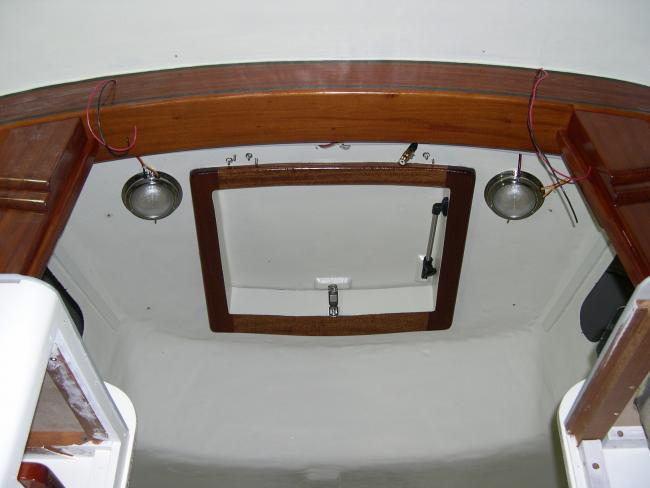
I shaped the outside edges of the frame and did some preliminary sanding. Then I glued the frame to the bottom side of the deck with thickened epoxy. After the epoxy dried and I could remove the clamps I ground the inside of the frame flush with the vertical lip of the hatch opening. Because the fiberglass was curved as it transitioned to the vertical lip there was a V shaped area that I had to fill with thickened epoxy. After that dried and I could sand it smooth I glassed in the inside perimeter of the deck opening from the top of the lip to the bottom of the wood. This strengthened the lip area and finished everything off.
Here are a couple of pictures of the completed project.

 Reply With Quote